Redstone Rig 2.0
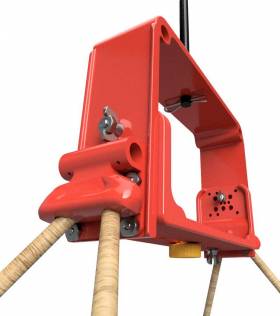 |
| Rendering of the new Redstone Rig model in Fusion 360. |
The new models were made in AutoDesk Fusion 360, a high end CAD program which allows more controlled model development than the free program I had been using (Sketchup). The new models were built from the ground up incorporating some new ideas about how the rig should work.
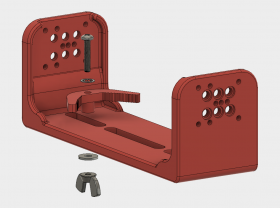 |
| The smaller holes on the tray ends are for use with the Saturn V Rig. |
It also has a choice of six different holes for bolting to the upper part of the rig. These holes determine the tilting axis of the camera and allow for front-back balance and up-down balance (so a tilted camera stays balanced front-to-back). An additional feature allows the front-back balance to be fine tuned. The long slot in the tray does not run down the center of the tray, so pointing the camera in the opposite direction changes the balance slightly. All this means that without any drilling you can find a mounting arrangement that allows your camera to be balanced under the suspension (and therefore level) whether you are shooting straight down or at any oblique angle.
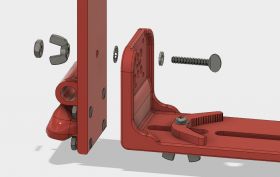 |
| The hardware from the original Redstone Rig is used on the new parts. All the hardware is included in the kits. |
Changes to the leg bracket model make it much stronger and easier to bolt on. They also allow it to be used on the Aerobee Rig where the brackets are attached differently and on the Saturn V Rig which requires set screws to prevent twisting of the PET tubing bumpers. So the leg brackets are included in four different rig kits (Redstone, Aerobee, Titan 2, and Saturn V). The new camera tray will work on all of those rigs except the Aerobee. For the Saturn V Rig, lots of little bolt holes in the tray allow a servo horn to be attached so the servo can tilt the tray.
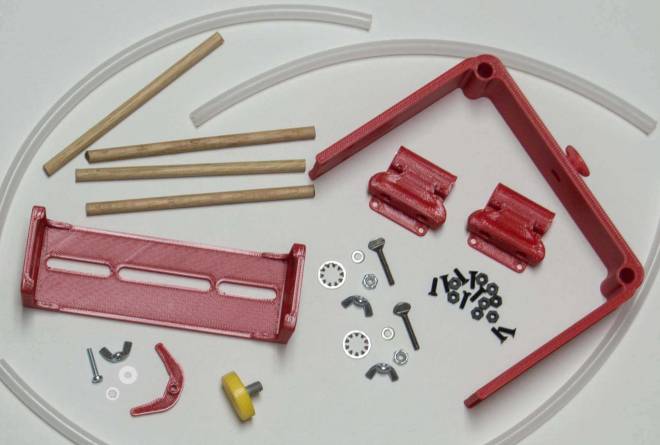 |
| These parts are included in the Redstone Rig 2.0 Kit. No drilling, cutting, or gluing is required for assembly. |
A powerful feature of AutoDesk Fusion 360 is the ability to add 3D models of thousands of different hardware items from the McMaster Carr website where I buy most of the hardware to make the kits. So I was able to simulate assembled Redstone Rigs and make exploded diagrams for the assembly instructions.
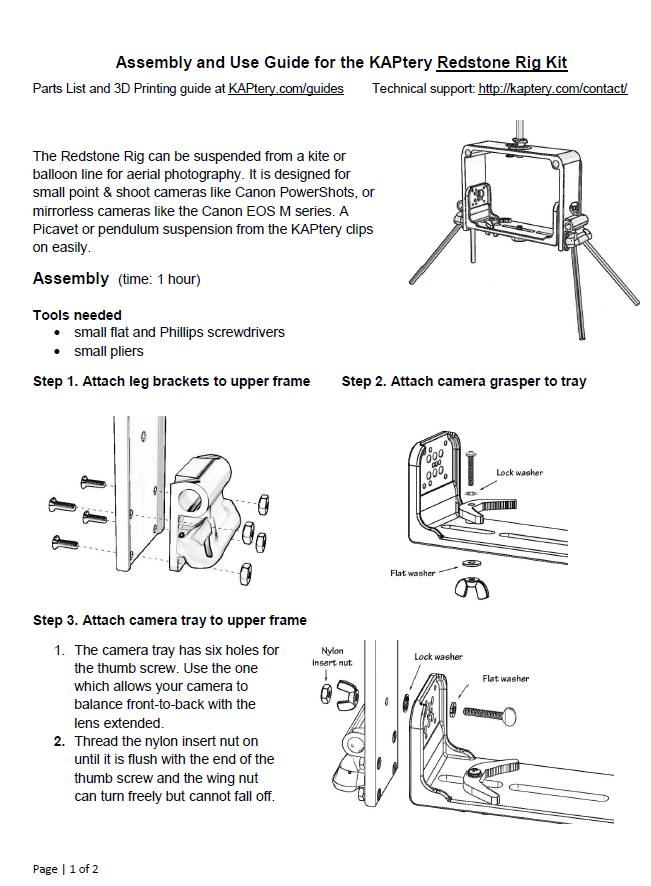 |
| Page from the assembly and use guide for the new Redstone Rig. |
There are a few of the original Redstone Rig Kits still available, and they are on sale for a steep discount. While they last, you can get a package including kits for a Redstone Rig and Picavet Suspension for $40.00 (including US shipping) which is less than just the new Redstone Rig 2.0 with no suspension. You have to drill a hole to match the tripod socket on your camera, but that's the only drilling. For lightweight flying, the Classic Redstone is still an excellent solution.
